Although the integration of the recently updated Google Photos, my Android phone, and my Google+ account were streamlined and mostly seamless with Blogger, I grew bored of the theme options and tedious mediocrity of the customisation. Too much was “obviously too basic”, and I wanted a more exciting blog. So I’ve swtiched us over to WordPress and so far feel good about it.
Let us know if you like the new blog and if you have any feedback.
Due to the insane wind on Saturday and despite our efforts, we realised that our apexes were off center for many of the trusses. Perhaps not the biggest problem, but being in the category of “not too hard to fix” and “not sure what future ramifications this will lead to” we decided to re-align them.
Jimmy and Jaimin headed out on Monday night and got a system going (Jimmy removing the twist nails from the trusses, Jaimin undoing bracing and then positioning the apex along the string line.
Really really really really really windy on Saturday
Productive, fun, tiring
Jim & Lil came to stay this weekend so we had great company. On Saturday morning James P had offered himself as an early starter so he and Jaimin met on site at 7.15. The first few trusses took a while and were massively hampered by the wind blowing the apex string off center, which proved impossible to resolve despite spending a lot of time on.
At around 10.30, Jim arrived and after a brief “handover” with James, got properly stuck in. The wind battered them all day, with grit in the eyes being a major issue.
Jim the joiner – scary fella
Jaimin’s new Makita cordless impact driver was on show, and proved to be an excellent tool helping to make the structural wood screws sit flush in the newly made double trusses. The girls and children delivered an exemplary lunch (best soup ever, according to Lil) to refuel the boys, and Lucy even did some impact driving!
Lil & Finn, just chillin’
Jack hiding from the wind
Lucy teaching Jaimin how to use the impact driver
Saturday ended with making the final double, then heading (wind blown and tired) home.
Sunday was a more reasonable start – 10 am – and included Jimmy as well! Good teamwork meant that the faff of un-securing, laying down, sliding, lifting and re-securing trusses to the east gable, to allow us to restart the main line of trusses in order, was efficient. By the time the lunch delivery arrived with the families they were all done.
Having braced the internal side of the rafters with angled sarking, we downed tools to have a picnic, and less than 5 minutes later a proper shower came through forcing us in to the barn for lunch! At least we had a view.
Truss erection done
Heavy shower, retreat to the barn…
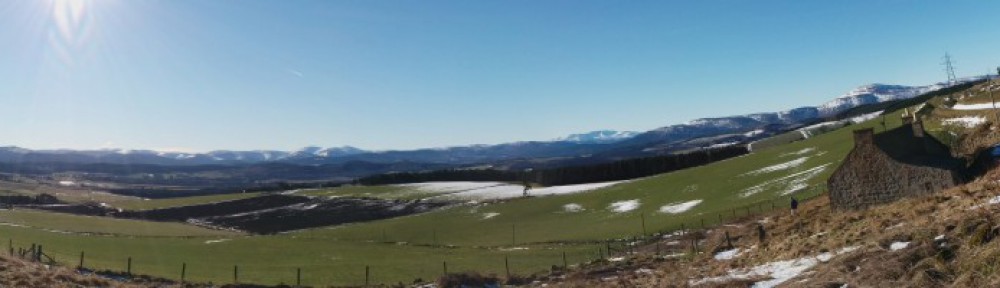
After lunch we headed up the hill to explore the fishing loch behind the plot which we’ve known about but never visited. A beautiful little place, perfect for a stroll and a sunny afternoon and made even more fun by some old stone ruins nearby for the kids to play on/in.
The ruins are in the background.
A phenomenal effort from Mr Lusty, transforming himself in to Jim the Joiner within minutes of arrival. His name is added to the list of contributors that will be “etched in to the fabric” of the cottage. Thanks Jim!
Yesterday evening Ben made his debut on site as a workman alongside a returning James. Here he is admiring his early contribution:
The plan we are aiming for is something like this:
James, Ben and Jaimin got all the trusses in to the building and then commenced with fixing a few in to place using Cullen FAS Framing Anchors for the doubles and Cullen TC truss clips for the singles. The first was a double and being a bit heavy there was some deliberation on how to swing it up in to place. After making a “pushing pole” for James to use, Ben and Jaimin ascended the walls and heaved it up in to place before fixing it to the pre-installed braces on the gable. Lots of measuring, checking, plumb-lining, squaring and fiddling eventually resulted in 4 framing anchors being nailed in with square twist nails. The process was repeated and lots of measuring took place. Eventually we managed to erect 2 doubles for the stairs and the west side of the west rooflight, and 2 singles.
Sunday started as a miserable wet day so the plan had to be delayed. When the weather cleared in the afternoon, Jaimin headed to site and met James who was the day’s labour (and good labour too).
After a lot of deliberation and discussion on methods of bracing the first truss (which will be a double truss for the stairs) Jaimin ascended the ladder with the hammer drill and fixings, and installed 2 plates in the to the west gable end which will be used to attach bracing. You can just make one out in the second image. Once they were in, it was up the ladder again this time to the apex, to string a line between the gables as a guide for the truss peaks.
After some more deliberating and one or 2 attempts to get a truss in, they developed an effective and simple system for sliding the trusses from the bank of earth at the back, onto a 4.8m spreader beam that was leaning over the lean-to wall, on to another 4.8m beam spanning the lean to and on to the main wall. Then James would go in to the house, Jaimin would climb on to the wall, and between them they’d ease the truss upside down in to the cottage. They did this with half the trusses:
Once they had 13 trusses in, James helped Jaimin build a double truss using Simpson Strong Tie structural wood screws. These are awesome because they can be installed from one side, no pilot hole needed, and no bolts required. But they need 50 per double, so lots of screwing with the drill. Once the first double was built, they set up 2 more doubles (seven will be needed in total) and Jaimin set about making them up.
Saturday was a semi decent day of weather so Jaimin headed out again to make progress on the wall plate, so that we can start on truss erection soon.
The day was split in to preparation and installation and was very productive. First off Jaimin had to lower the truss that was up from yesterday. This involved some luck, thought, geometry and use of ladders as supports. Interesting to say the least.
Next he removed all the C16 wall plate timber from the walls, took down the lintels and backed them in a DPC (damp proof course) to protect it from the masonry.
Once that was complete he reinstated all the timber, and set up the laser level to see how level the wall head (top of the stone wall) and then the wall plate timbers, were. It was very good, but needed a tickle below the window lintels and under once or 2 spots of wall plate. Having established the requirements he cut out a 600mm spacer, and went along the wall plate with a pen to mark off the approximate locations of the trusses and the hammer fixings (600mm centers along the wall plate). The double trusses needed accounting for which was a little tricky but worked out fine.
At 1530, Simon turned up to then lend a hand. The first thing to do was to get the whole thing level. Some mortar was mixed in the barrow and one person was used to support and hold up timbers while the other person laid mortar beneath it to raise the level. Simon likes the electromechanical toys on show and seems to be happy with his levelling skills:
Next they had to make the wall plates as straight as possible along the wall and check they were parallel. This was done using the laser measure, and although it was never going to be millimetre perfect was within 10mm along the length of the building, so pretty good.
Once the levelling and straightening was complete, it was time to get Thomas’s SDS drill out and stick in a new 8mm DeWalt bit to drill some fixing holes! Simon was on hammer drilling while Jaimin made the holes in the timber using an 8mm timber bit and the cordless. Installing the hammer fixings was very easy – push in the plug and hammer firmly! Only one fixing went awry, but it’s not going anywhere anyway…
A great lot of progress for one day and we are now ready to install some trusses, somehow…
On Thursday 2 significant things happened, one more significant that the other.
First and foremost it was the day of the Local Review Body meeting where tabled and decided our appeal for planning permission for the main house. At around 4 pm we were informed by Peter (the architect who we’ve all forgotten about over the past few months) that we were granted planning permission!
This is how it played out:
Motion
Councillor Fergus Hood, seconded by Councillor Peter Bellarby
“To DISMISS the Notice of Review and Uphold the Appointed Officer’s decision to REFUSE for the reasons stated within the decision notice issued on 27 February, 2015”
Amendment
Councillor Cryle Shand, seconded by Councillor Alastair Ross
“To UPHOLD the Notice of Review and REVERSE the determination reviewed by it and GRANT Full Planning Permission subject to appropriate conditions”
The Vote was :
for the MOTION – Cllr Bellarby, Cassie and Hood (3) and
for the AMENDMENT – Cllr Pratt, Ross and Shand (3)
Those in support of the proposed development took the view that the design of a dwellinghouse should on this occasion not be used as a reason for refusal as there was latitude within the Aberdeenshire Local Development Plan policies to accept a design which was innovative and did not necessarily follow the traditional vernacular or contemporary design feature within the surrounding area. Because the Chairman (Cllr Pratt) has the casting vote, the Amendment won the vote.
To think it has taken so long is very frustrating of course, and that it came so close as to be made by a single person’s position on the Review Body is probably testament to the complexity of the case, but it does go to highlight the obvious flaws in the planning system. Why couldn’t the planners see and use the “latitude in the Local Development Plan” in the first place? etc etc etc ad infinitum.
The second thing of significance was that we took then took delivery of the trusses. Brad lent a hand to offload and stack them, and then helped Jaimin to lift one on to the walls to see how close they would be to fitting… Thankfully they look pretty good, we think. Now we need to get them up!
After Brad helped Jaimin lay the truss down, he got on with cutting the wall plate timbers to size.
Having earned a break, last weekend Lucy and Jaimin went to Greece for a friend’s wedding. In their absence, James and Simon stepped up in a massive way to help keep things moving, and using the Small Buildings Structural Guidance document (page 68) made up a set of brand new set of lintels. Based on a few sources including SBSG, the Rhodes’ structural drawings and some online research, triple beams of C24 treated structural timber was used, with galvanised screws to fasten according to the nailing schedule.
Simon hard at work
Once the lintels were done they got on to some digging, and managed to dig out a long length of the clay pipe which helped deepen the soil pipe trench. Hard going but much appreciated.
Today was a busy and big day. After all the preparation and the last minute decision to bring forward the slab pour, and to use the costly but very efficient Lovie’s concrete pump, it was about to happen.
After thinking a bit more about the shower pipe and due to the uncertainty it had created, some 11th hour decisions were made the night before including that we would barrier off the pipe and cement it in at a later date. Why we hadn’t’ already decided this is for another day…
Jaimin headed to the plot early via the quarry and set about building a quick timber frame barrier, then spreading another 1.25 tons of scalpings.
Shower pipe barrier
More scalpings…doing a great job.
The day really started with the arrival of the concrete pump. Thankfully he had no issues with getting to site, even though we had a couple of rain showers.
Arrival…
While he set himself up Lucy arrived with the kids and DVD players (good trick), and soon after, our guide for the day Bridget came too, despite being a bit under the weather. Huge thanks to her for her help even though she will claim no glory. 🙂
One for Grand Designs…?
Jaimin set up a Garmin Virb on the window lintel to capture a time lapse of the saga. It was generously lent by Dr Bike of Enth Degree – (thanks)!
Once the pump was set up we waited on the mixer lorry who got a bit lost. Once he arrived he had some serious manoeuvring to do to reverse all the way down the track to the pump.
Then it all kicked off, and this is how it went (it might be better watched on YouTube?).
We were pleased with the results and it was a bonus to have got some driveway 🙂
New driveway! Sort of.
Once the slab was done we breathed a sigh of relief, had a sandwich in the car while it rained, then tidied up and went home.
Thanks to the Rhodes‘ for spazzling, babysitting, equipment and advice; we would have struggled without it all. Thanks to Dr Bike for the Garmin Virb which was just brilliant, way better than we expected. And thanks to CHAP and Lovies for providing a very good service.
Saturday was split into 2 main jobs – insulation (in the last post) and rebar. Once the insulation was in we went around with some more foam and then lots of foil backed tape to seal as many joints as we could. We don’t know if this was needed and will help, but self builders bang on about this being the way to do it.
Installing the rebar was no easy feat, being 2.4 x 4.8m sheets and therefore unable to fit through the doorway… thankfully the roof was off so we could go over the walls with it, somehow. This was interesting and one of the times we wish we had a GoPro on a tripod.
Once we had it all in we had to tie it all together with anodized tie wire, and install small spacers to hold it above the insulation. These can be set up as 60mm or 75mm, and in our case laid on their side above the sleeper wall to give a 10mm gap. Some bricks were also used as they are 75mm and can be walked on, where the spacers pierce the insulation… 😦
Lucy tying spacers on and getting sunburnt by the reflection…
Rebar laid
On Sunday there was a bit more spacer tying to be done, then we had to go around the vertical 25mm “wall insulation” to draw on the FFL (Finished Floor Level) and TOC (Top of Concrete) so we have something to work towards. We used the laser level for this, which was pretty hard to see on the foil backed insulation! The TOC is marked as the Green line below:
The green lines, which should have been done before the rebar…
Once that was done Jaimin had the job of trying to get the shower trap installed and set up to the correct level, as the waste pipe has to be set in the slab. This has huge potential to go badly… After lengthy observations of the ridiculously bad “instructions” the most efficient method was some trusty slates and wire to hold them in place.
Shower trap installation… who knows how this will turn out.